I've heard about a mythical beer coming out of the Russian River Brewing Company in Sonoma County, California. It's billed as a double IPA (which means it's pretty hoppy) and has won the Zymurgy magazine Best Beer in America title 5 years in a row now. It's apparently only brewed in small quantities so it's hard to find without travelling to the west coast.
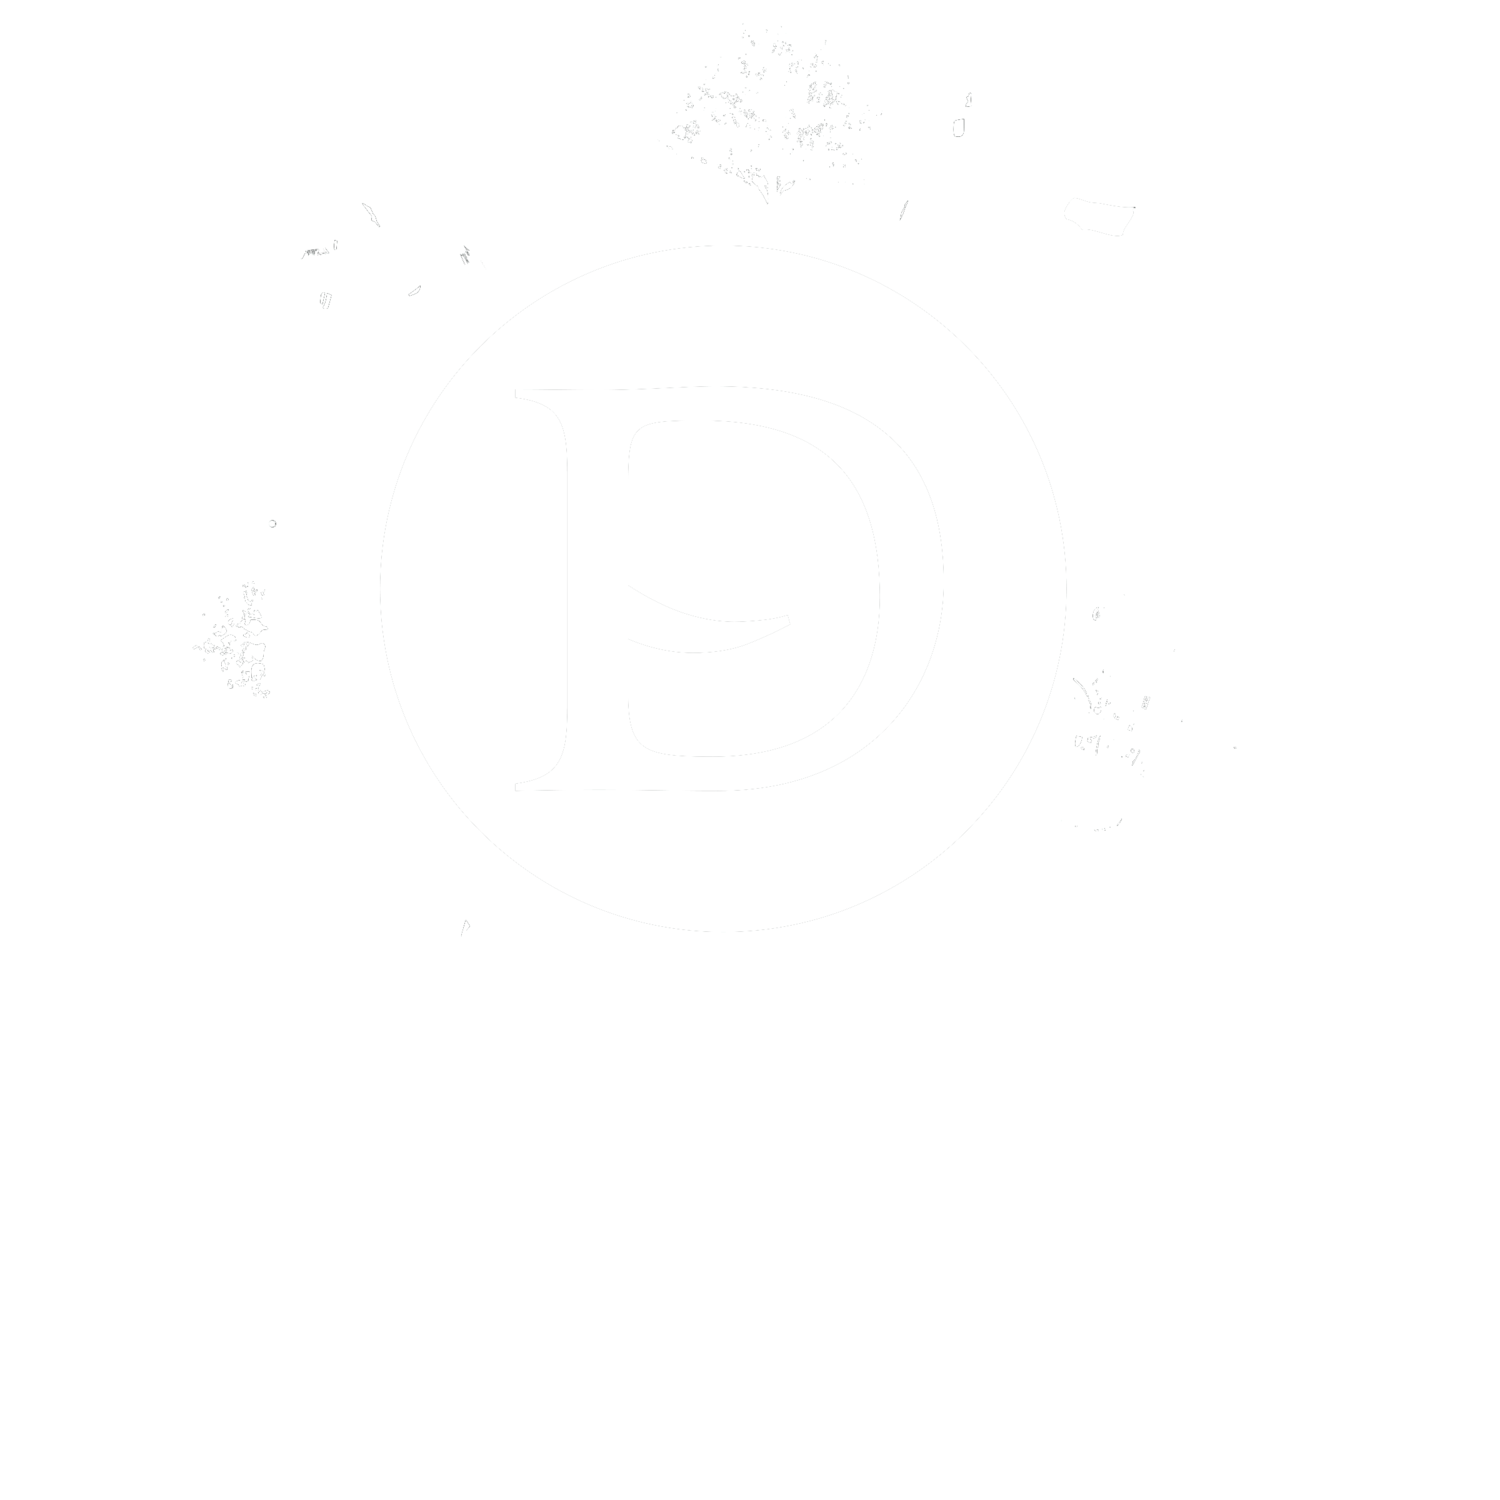
 Ingredients and equipment from Austin Homebrew Supply
Well I hate feeling left out so I figured I'd just try to make some. There are several brew supply companies that sell a clone kit that allows the home brewer to try and approximate their favorite brews. I've been successful at replicating the Sierra Nevada Torpedo... but others didn't quite make the grade. With winter approaching however, I figured I'd need some hefty double IPA to get me through the season. I found a clone with pretty good reviews down at Austin Homebrew Supply and on a "fyne and pleasant" August morning I ventured forth with the mini-mash process.
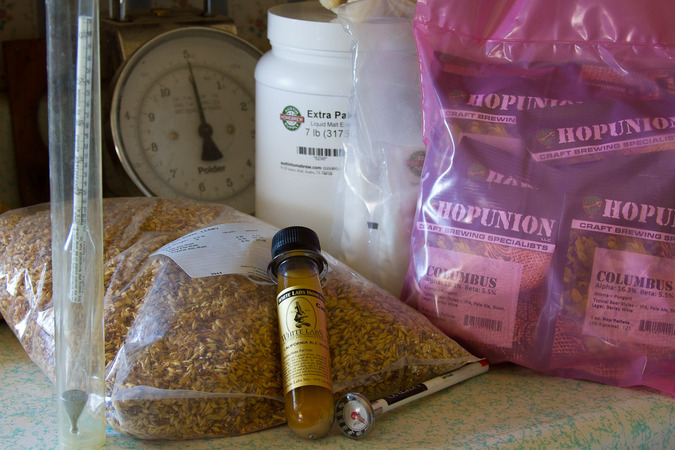
Admittedly, one has to employ a certain lowering of expectations when brewing from a mini-mash kit. So with appropriately lowered aims, I boiled water and soaked grains:
 the grains soak in 155° water for a quarter hour or so...After the soaking and a good rinse (this rinse is a bit of a shortcut as a proper sparge will get a good deal more sugar out of those grains), the grain is discarded (fed to chickens, actually) and now we add sugar in the form of corn sugar and malt extract.
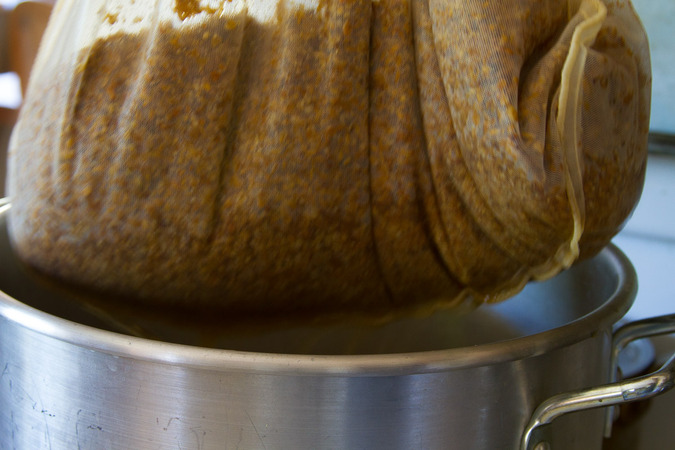
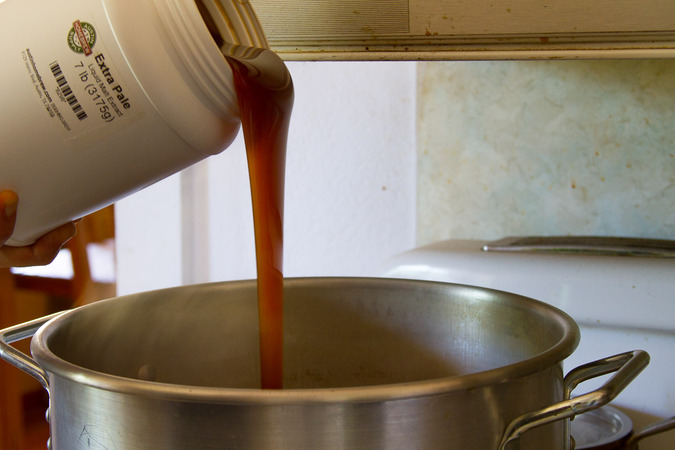 Corn sugar and malt extract make up for the small quantity of grain in the mini-mash.This sugary mixture is heated again until it reaches the boiling point. Now we have to control the fire so that we have a good rolling boil without boiling over. We'll stay at that temperature for 90 minutes. At various points over the next hour and a half, we'll add the hops. This is where a beer will find its signature flavors. In this instance, we'll add Columbus hops for bittering, Simcoe hops for flavor and Centennial, Chinook and more Simcoe hops for aroma.
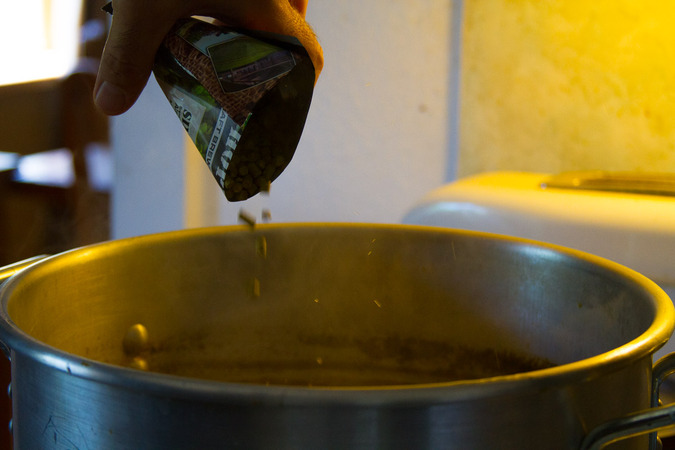 Pellet hops are better for consistency, but they make it difficult to keep your beer clear.Here's where things get exciting. After a couple of hours of watching a pot boil, we have about 20 minutes to cool the whole thing down to 80°. So I put the whole pot in a sink full of ice and run cold water through a wort chiller (that has been sterilized in the boiling mash/wort). A wort chiller is just a coil of copper that transfers the heat of the mash to the water running through the coil. We need to drop the temp so that the wort is minimally exposed to the air while we make the environment (of the mash) palatable to the yeast which we will pitch as soon as we can. But before we do that, we'll mix in some distilled water to get our concoction to fill the carboy and then we'll take a reading of the sugars using the hydrometer.
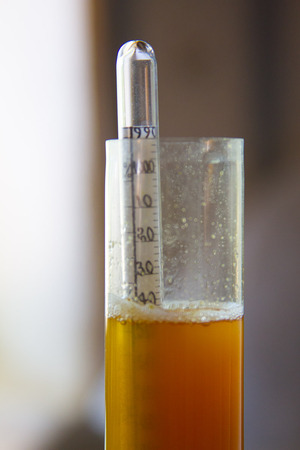
We were looking for a hydrometer reading of 1.072 but we came up a little short (as you can see the reading is about 1.052 (correcting for temperature). This may just be that the added distilled water did not get thoroughly mixed in with the mash... I'm gonna go with that assumption here. If it really is that low, it means that there isn't enough sugar to get us to the intended alcohol content range (around 8%). But we did add 8 lbs of sugar, plus whatever came out of the grains, so I think it's safe to say there's a lot of sugar in there.
Next we pitch the yeast. I put 2 in vials of White Labs California Ale yeast, which is what they recommended, but I think that's overkill. The fermentation took off like a rocket and was quite violent the very next morning.
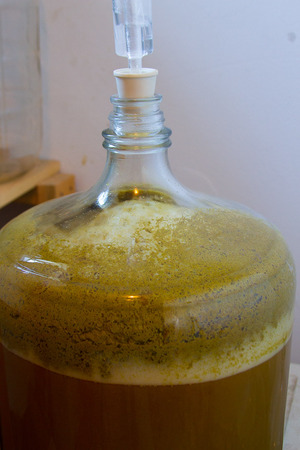 It's not uncommon for yeast to take a day or two to kick in, but this batch was motivated!
When the original fermentation was complete (in 5 days!), it was time to get the beer off of all the hops and dead yeasty bits. The beer was transferred into a new carboy along with... MORE HOPS! Again it was Simcoe, Columbus and Centennial for the "dry hop" stage. A second more gentle fermentation takes place here and in a week it was ready to bottle, but there was still a bit of cloudiness, so I'll let it rest another week or so before I disturb it.
The mini-mash kits are in the $40-$50 range and make 5 gallons of beer. So if you spend $10 to $15 for a growler (a half gallon), you are spending well over twice as much as necessary for your beer... and if you're buying 6-packs at Mike's, you're really not doing yourself any favors. The equipment investment is not significant. So Uncle Jeffé says, "make your own, darn it!".
It's a super dry and hoppy, bitter brew, but if you like that kind of thing, it's delicious. I still have no idea what an actual Pliny the Elder tastes like, but hopefully I'll have an idea here soon.